Photo Shop Partner Project
Tutorials
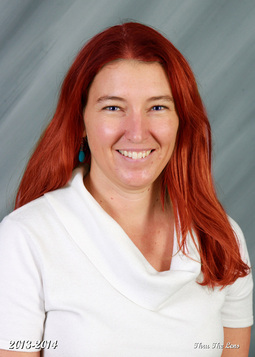
I changed Lauren Lucky's hair color from brunette to red and her eye color from hazel to purple.
|

I changed this teachers skin color from pink to a light fare complexion.
|
I took the normal text tool and changed the text from 2D to 3D crystal text.
|
Teacher Creature Project
|
This is my teacher creature that I created using Animas High Schools Head of school Jake Lower. I also used pictures of wild animals and a background. While creating this image it took a process of about 2-3 weeks. I created this image in photoshop with many tools such as the mask tool, eraser, hue and saturation, the feathering tool, etc. During this project I carefully selected different pieces of images and copy and pasted them onto my creature to make it look as believable as possible.
I think that the most challenging part of this project was deciding what creature and images to create and making the the final product as believable as possible. This was challenging because I am somewhat new to photoshop and there are so many tools that can be used to change the picture what you want it to be. I persevered through this challenge by asking for help when I needed it and by on my own time playing with photoshop to get a little better understanding on all of the tools and what they do. My favorite part of this project was playing around with the tools on the creature to see what made the teacher and creature look funny, sad, scary, nice, cute, or mad. This was my favorite part of the project because we got to transform our teachers face into whatever we wanted. I also really enjoyed working on getting to know and learn how to use photoshop better. I enjoyed this because photoshop is a really useful tool that I didn’t know how to use before this project. Throughout this project I have learned a lot about myself as an animas student. I have learned that I enjoy working alone on projects that I understand. Before this project I hated working alone and thought that it was no fun and that it was actually more challenging because there was no one there to help you work through it. But since this project I learned that working alone can be fun and that I enjoy getting to do something that I want instead of agreeing with someone on something all the time. I also learned that I am a very diligent person when there is little to no distractions. Normally I am someone that gets distracted very often and I have trouble focusing on my work. But throughout this project I sat somewhere quiet where there weren’t very many people and listened to my music helping me concentrate on my work easier. I also learned that I need to learn how to use my resources a little more. I did not use the project rubric which caused me to not include a lot of items on the rubric causing me to lose a lot of points. |
|
Landscape
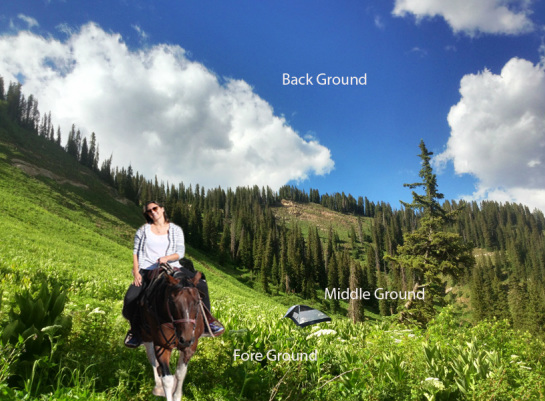
This was a landscape project that we did in digital arts. During this project we learned about proportion and Foreground, Middleground, and Background. We took three different pictures and combined them all into one making a picture with a different Foreground, Middleground and Background. My image combines three different pictures that were the background, a tent, and a woman on a horse. I used the selection tool to select the tent for on picture and copied and pasted it onto the image I was using as the background. Once it was pasted I used control T to select the image so that I could move and size the object. While resizing the object I held down shift so that the picture would not warp into stretched picture. When the tent size was believable and as close to accurate as possible I placed in on the background where it would symbolize and be the middleground. Once I finished working with the tent picture I took the picture with the woman riding the horse and selected her and copied and pasted her onto the same image as the tent was on. I started the same process of resizing and placing the image as I did with the tent but this time I put her in the foreground. The finished product was the background with the tent as the middleground and the woman and her horse as the foreground.
The tools I found most useful during the project was the selection tool and the grab tool. These tools were the tools that I used the most during this project. While we were doing this project we also learned how to extract files that were zipped and unzipped and we also learned how to unzip a zipped file. This skill came in very helpful because when we were exporting files and pictures a lot of the files were zipped and protected. We also learned about the differences between a PSD (photoshop document) and a JPEG (a format for compressing files). The differences were a PSD is a photoshop file that will save every layer in photoshop so that you can go back and continue editing it at a different time but also a photoshop file that will not work on a computer that does not have the photoshop program. A JPEG is a file that will flatten all of your edited layers on photoshop onto one and that will not save all the layers.
